Getting Started with Employee Project Scheduling
Prerequisites
Locations, departments, and employees have already been entered into the software. If not, go through the entering master data and/or the leave scheduling guide first.
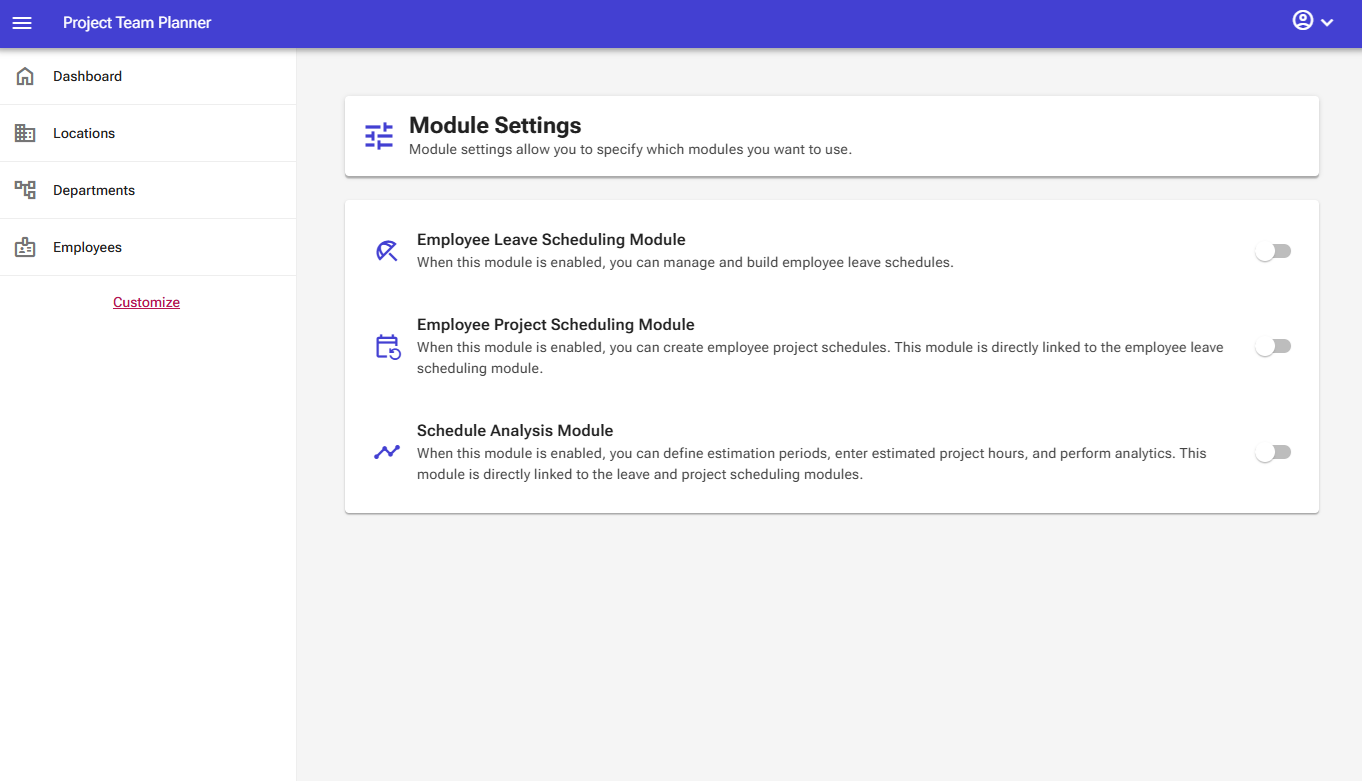
Activating the Module
- In the bottom-left menu, go to Customize.
- Activate the Employee Project Scheduling module.
Once activated, the Projects and Employee Project Scheduling sections will appear in the menu.
Step 1: Creating Schedule Items
- Go to Employee Project Scheduling > Schedule Items.
- Click New and create an item, for example, Assigned.
- Click Save
Step 2: Creating Projects
- Go to Projects
- Click New and register a project by entering a project code and project name.
- Click Save
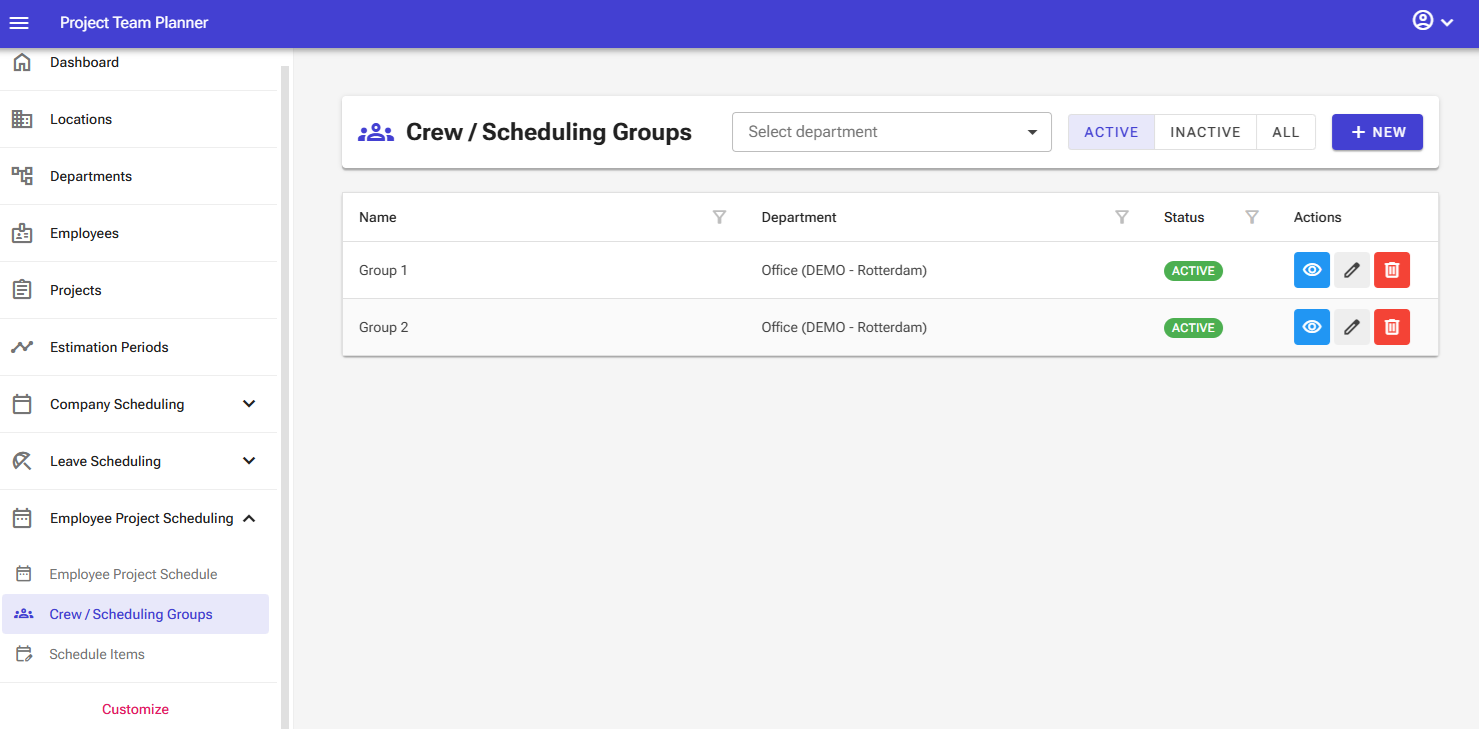
Step 3: Setting Up the a Schedule Group
- Go to Employee Project Scheduling > Scheduling Groups.
- Click New and enter a groupname and select a Department. Its recommened to use a project-location name here.
- Click Save
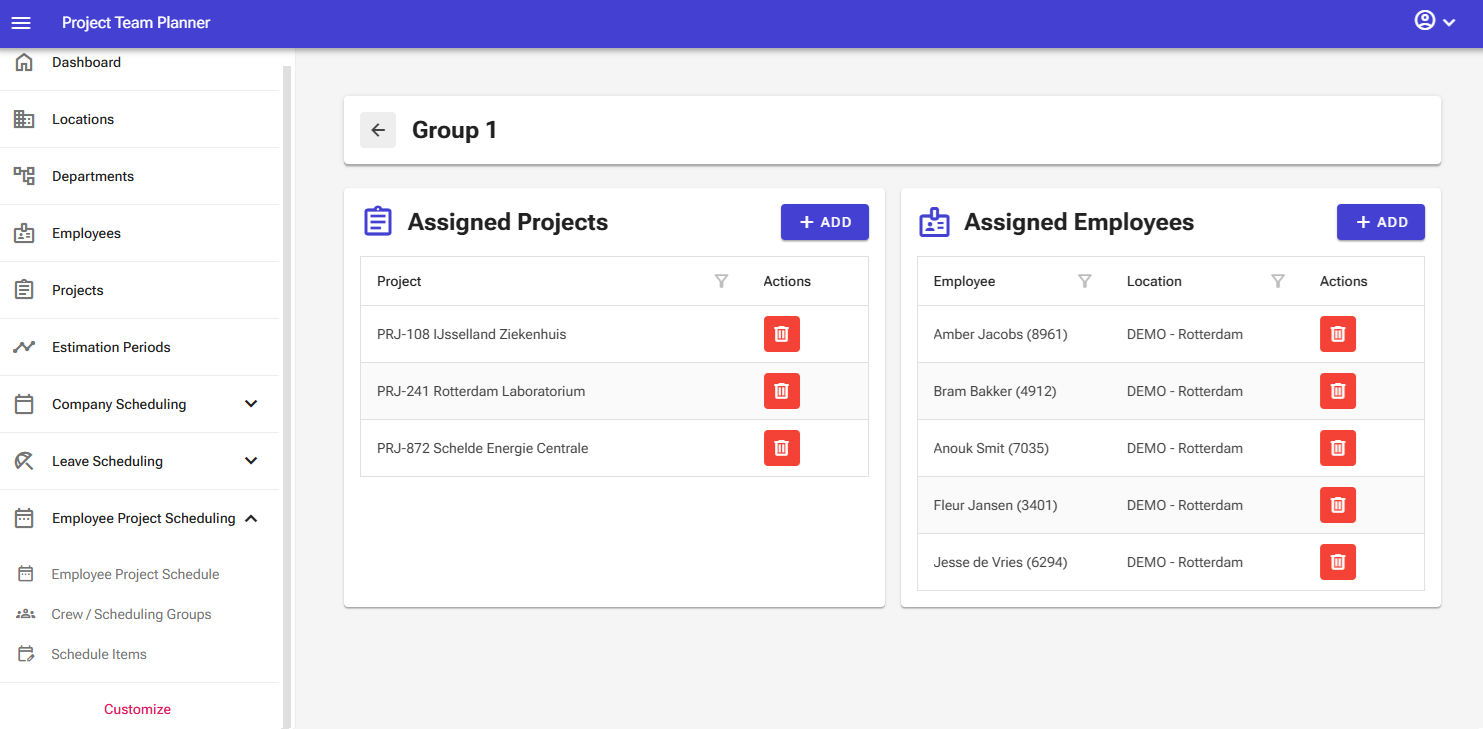
- Click on the Details button.
- Click on the Add button in the Assigned projects section.
- Select the project you created and click on Add
- Click on the Add button in the Assigned employees section.
- Select a employee and click on Add
Step 4: Scheduling Employees
- Go to Employee Project Scheduling > Employee Project Scheduling.
- Select the department and schedule item at the top.
- Left-click on the grid for the desired date next to an employee's name to schedule a day, or left-click hold, move and release for adding a range.
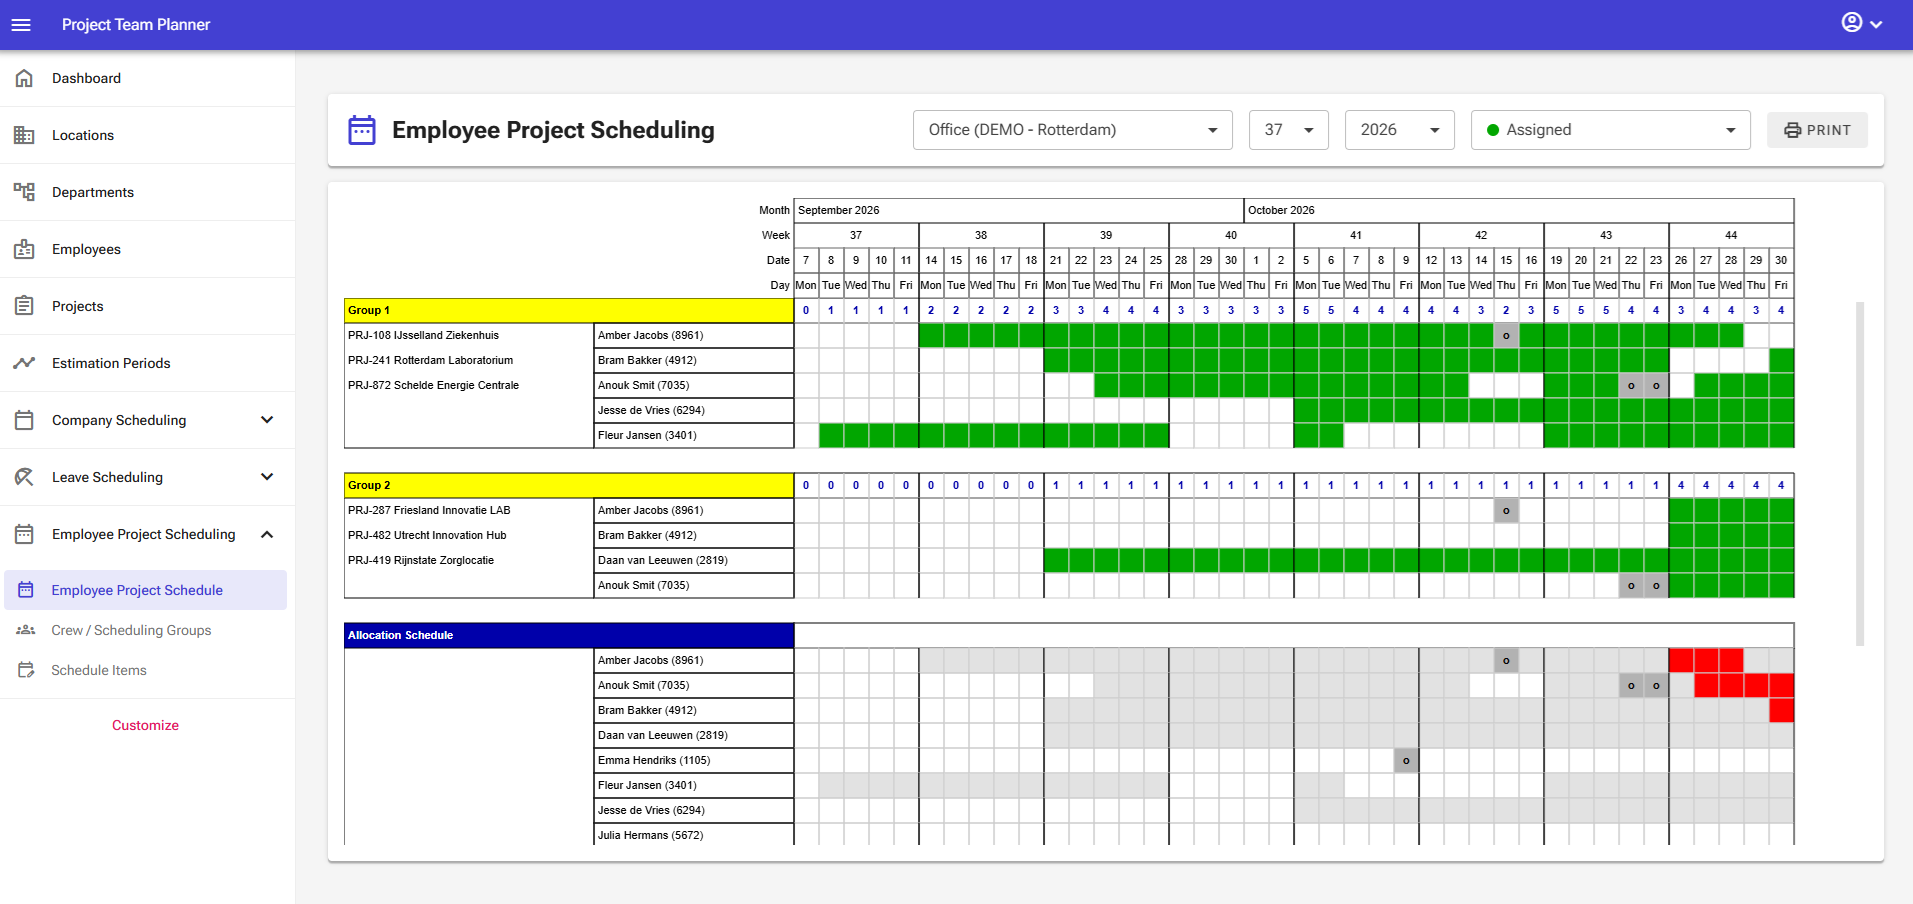
Note: As soon as you schedule something you will see the allocation schedule change as well. This is where you can spot double assignments.