Projects
Overview
Each company location manages its own set of projects. In the software, each project is defined by a Project Code and a Project Name, and is directly linked to a specific company location.

Role
Projects form a core component of the Employee Project Scheduling Module. Creating projects is required before you can allocate staff and schedule project work.
Prerequisites
Ensure you have set up at least one Company Location before adding projects.
Operation & Functions
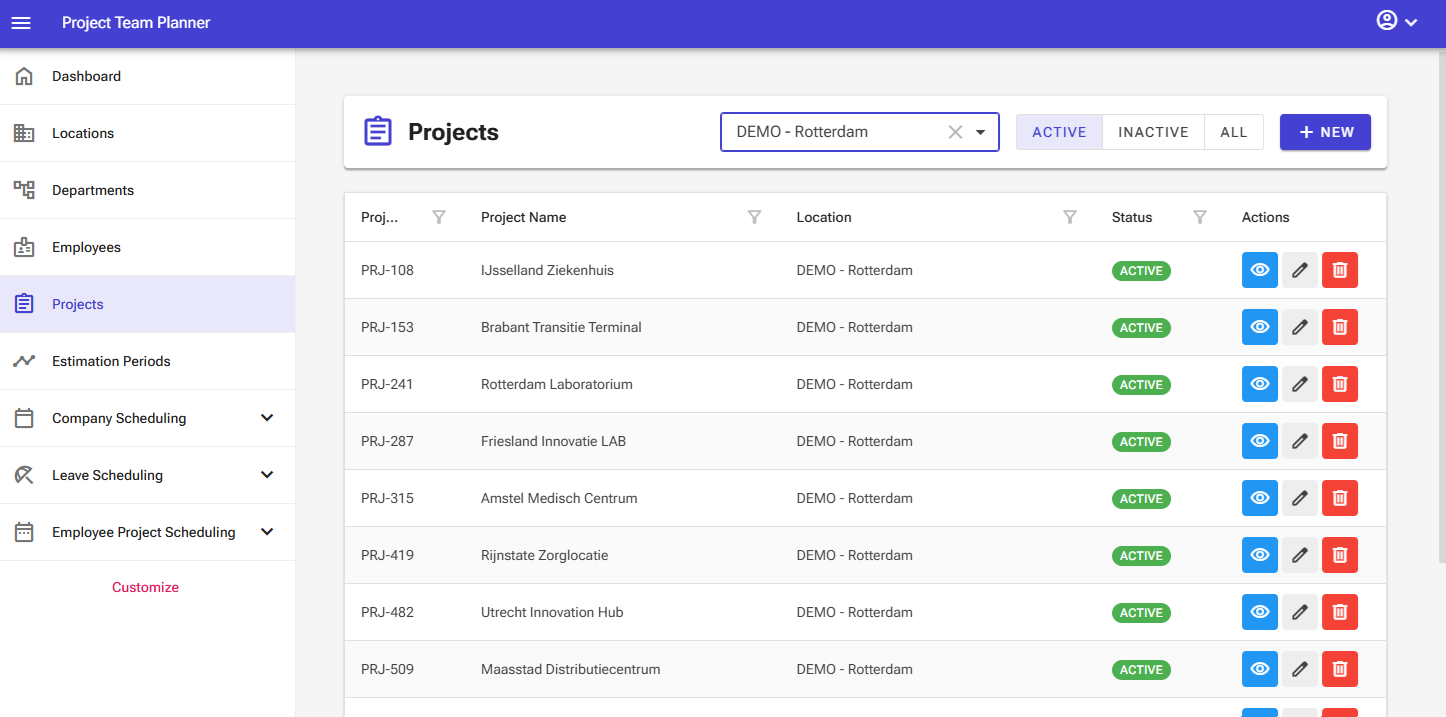
The project management screen contains the following elements:
- View filter: The top bar features a dropdown menu that allows you to filter projects by location.
- Status filter: The top bar features buttons that allow you to filter the overview by active, inactive, and all projects.
- New button: The top bar features a "New" button that allows you to add new projects.
- Overview: The screen displays an interactive table that lets you sort, filter, and search using the column headers.
The overview itself contains the following controls:
- Details button: Opens a detailed overview.
- Edit button: Allows you to edit an item.
- Delete button: Allows you to delete an item.
Note: In the server edition of the software, certain elements may not be visible depending on your user permissions.
Adding a Project
To add a new project:
- Select Projects from the left navigation menu.
- Click New.

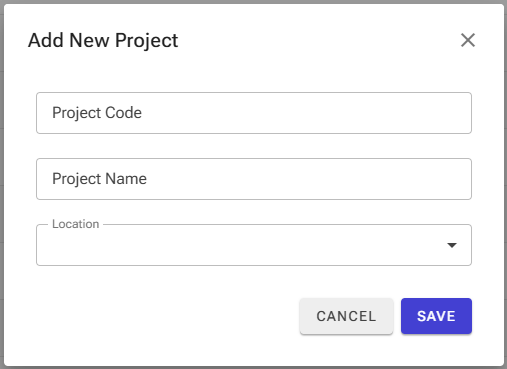
- Enter the Project Code, Project Name, and select the associated Company Location in the input form.
- Click Save.
Editing a Project
To update an existing project:
- Select Projects from the left navigation menu.
- Locate the target item and click Edit.

- Update the necessary fields and save your changes.
Deleting a Project
To remove a project:
- Select Projects from the left navigation menu.
- Locate the target item and click Delete.

- Confirm the deletion in the pop-up window.
Warning: Exercise extreme caution when deleting a project. Deleting a project permanently removes it from all active and past schedules.
Tip: Rather than deleting a project, we recommend setting its status to Inactive. This hides it from active planning views while preserving all historical (schedule) data.