Leave Schedule Items
Overview
Leave schedule items allow you to define the types of events available within the leave schedule. Commonly, this is where you define PTO days.
Role
The Leave Schedule Items are used in the Leave Schedule, and the dates they are used on are visible in the Leave Scheduling and Employee Project Scheduling.
System Schedule Item
The overview includes one permanent System Schedule Item initially named "Occupied". The following rules apply to this item:
- Editable: You can customize the description and properties of this item.
- Not selectable for scheduling: This item cannot be manually selected when scheduling days on the planner.
- Cannot be deleted: This item cannot be removed from the system.
Purpose: This system item is used for operational printouts (privacy-friendly overviews). It acts as a generic placeholder for all detailed schedule items, ensuring confidential leave details remain hidden on public schedules.
Prerequisites
Leave schedule items are a core component of both the Employee Leave Scheduling Module and the Employee Project Scheduling Module.
Operation & Functions
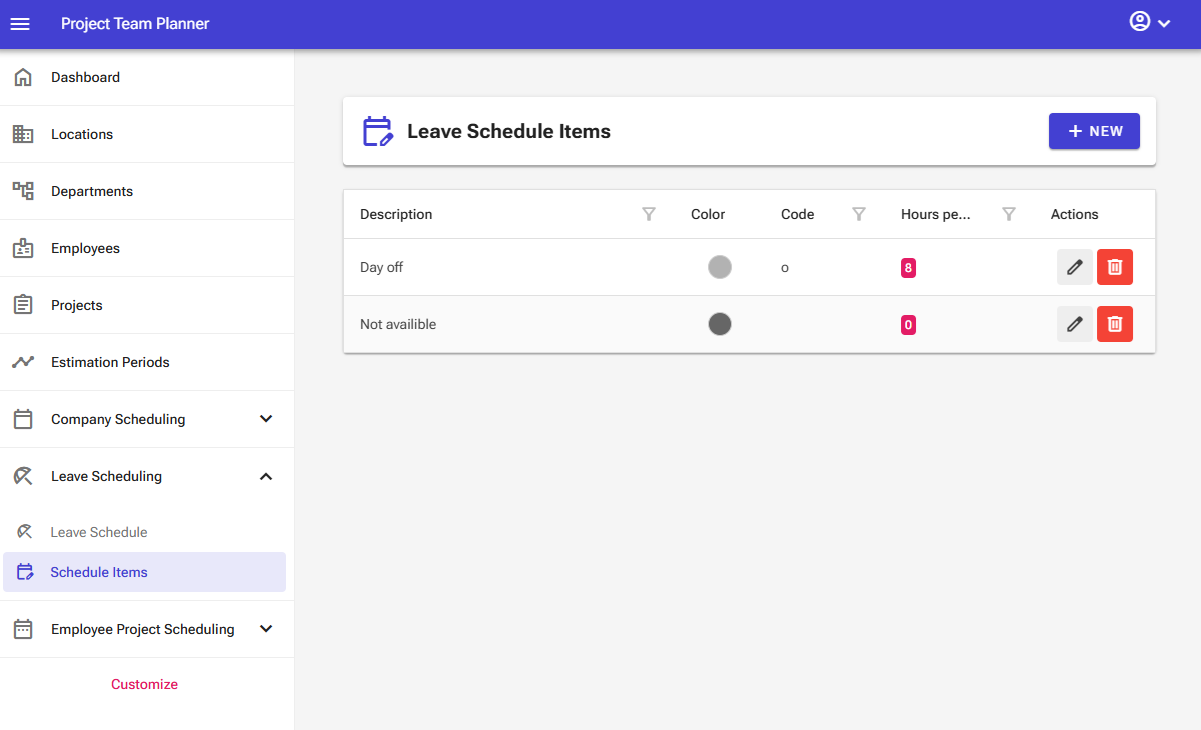
The leave schedule items management screen contains the following elements:
- New button: The top bar features a "New" button that allows you to add new leave schedule items.
- Overview: The screen displays an interactive table that lets you sort, filter, and search using the column headers.
The overview itself contains the following controls:
- Edit button: Allows you to edit an item.
- Delete button: Allows you to delete an item.
Note: In the server edition of the software, certain elements may not be visible depending on your user permissions.
Adding a Schedule Item
To add a new schedule item:
- Select Leave Scheduling > Schedule Items from the left navigation menu.
- Click New.

- Enter a Description for the schedule item (e.g., PTO Day), select a color, set an optional display code, and specify the number of hours the schedule item represents (typically 8 hours).
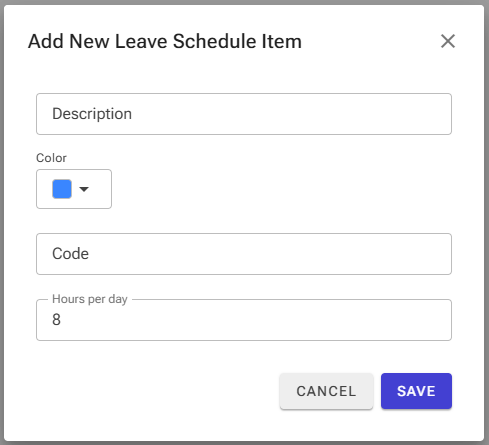
- Click Save.
Editing a Schedule Item
To update an existing schedule item:
- Select Leave Scheduling > Schedule Items from the left navigation menu.
- Locate the target item and click Edit.

- Update the necessary fields and save your changes.
Deleting a Schedule Item
To remove a schedule item:
- Select Leave Scheduling > Schedule Items from the left navigation menu.
- Locate the target item and click Delete.

- Confirm the deletion in the pop-up window.
Warning: Exercise extreme caution when deleting a schedule item. Deleting an item permanently removes all associated scheduled days.