Scheduling Groups
Overview
The Employee Project Schedule is built around Schedule Groups. Schedule Groups are defined by a group name and contain a list of assigned projects and employees. Groups are commonly named after a project leader or location. We recommend using locations to define groups, as this helps preserve historical records.
Role
Scheduling Groups are displayed on the Employee Project Schedule to define and organize related projects and employees.
Prerequisites
Schedule Groups are a core component of the Employee Project Scheduling Module.
Operation & Functions
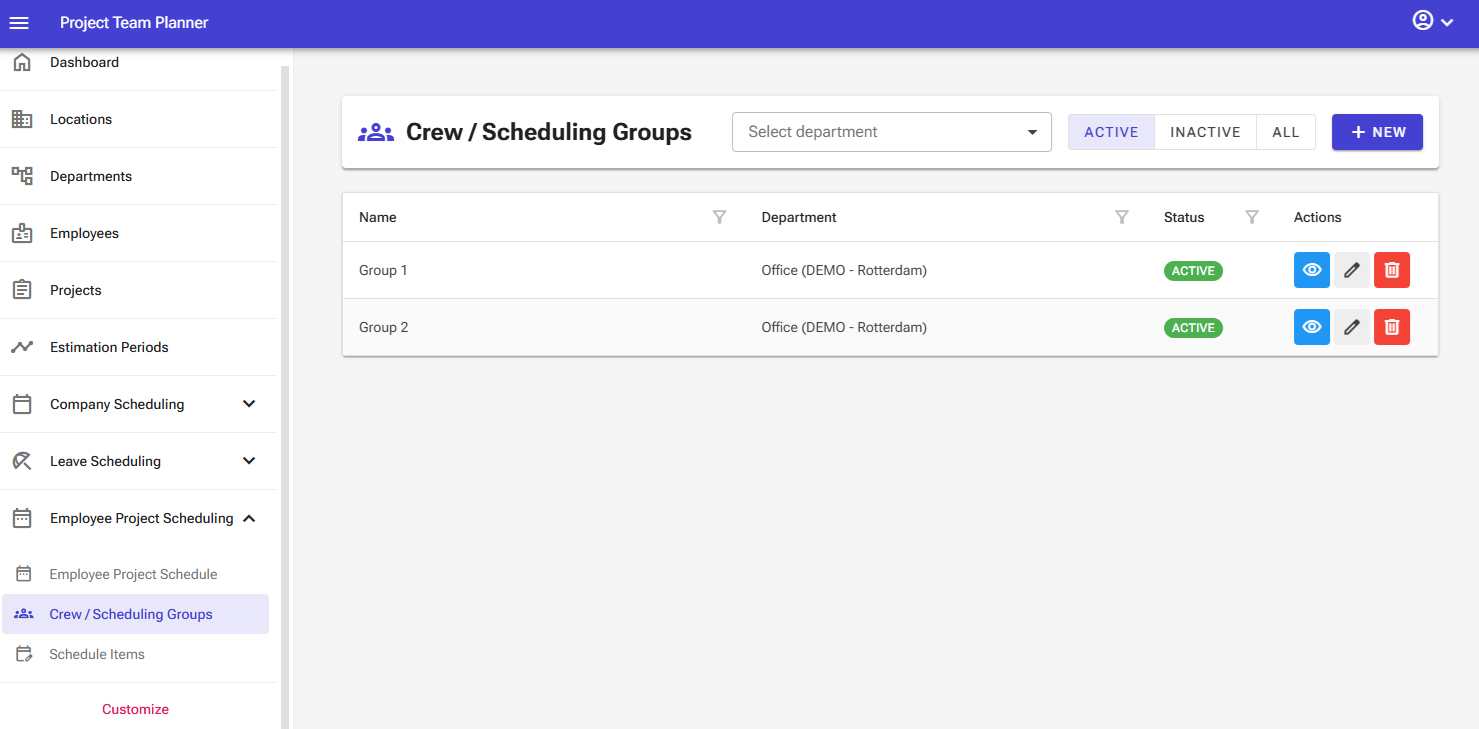
The schedule groups management screen includes the following controls:
- View Filter: Top-bar dropdown menu to filter schedule groups by department.
- Status Filter: Top-bar buttons to filter the list by active, inactive, or all scheduling groups.
- New Button: Located in the top bar to create new groups.
- Overview Table: Interactive table that allows sorting, filtering, and searching using column headers.
The overview table provides the following action buttons for each row:
- Details Button: Opens a detailed view where you can manage linked employees and projects.
- Edit Button: Allows you to edit group details.
- Delete Button: Allows you to remove a group.
Note: In the server edition of the software, certain elements may not be visible depending on your user permissions.
Adding a Scheduling Group
To add a new schedule item:
- Select Employee Project Scheduling > Schedule Groups from the left navigation menu.
- Click New.

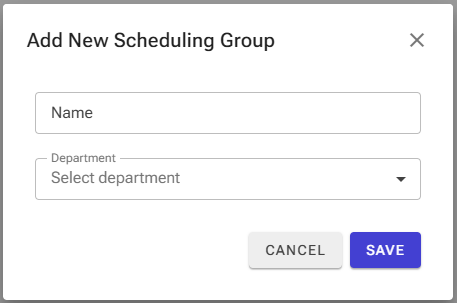
- Enter a Name for the schedule group and select the department for where to display the group.
-
Click Save.
-
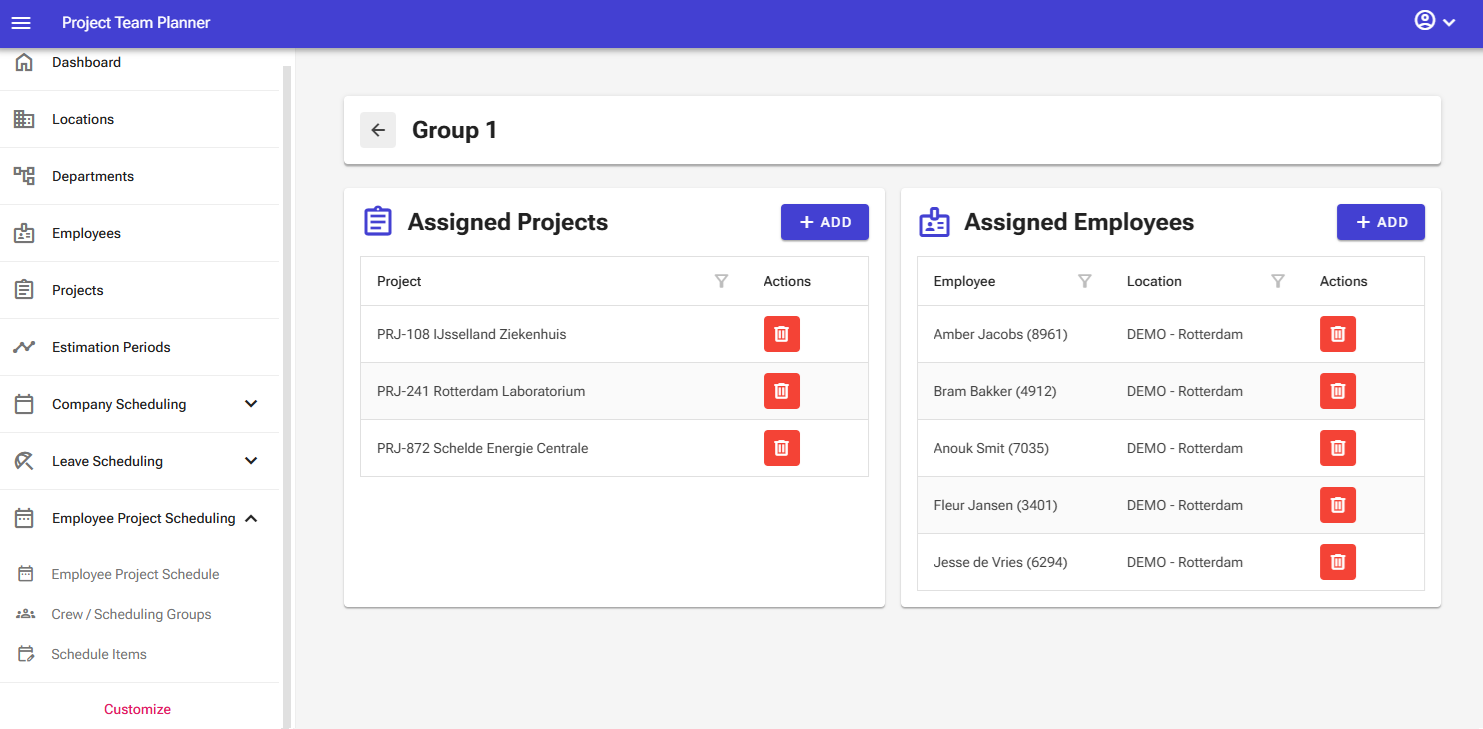
Click Details on the newly created group.

- Use the Add buttons to assign projects and employees.
Editing a Scheduling Group
To update an existing schedule item:
- Select Employee Project Scheduling > Schedule Groups from the left navigation menu.
- To change the group name, locate the target item and click Edit.

- Update the name and save your changes.
To update linked projects and employees:
- Click Details for the target group
- Use the Add or remove buttons to update projects and employees.
Note: Inactive projects and employees are automatically removed from the active group list.
Note: If an employee is not actively assigned to work in a project group, they will be hidden on printouts.
Deleting a Schedule Group
To remove a schedule group:
- Select Employee Project Scheduling > Schedule Items from the left navigation menu.
- Locate the target item and click Delete.

- Confirm the deletion in the pop-up window.
Warning: Exercise extreme caution when deleting a schedule group. Deleting a group permanently removes all associated historical data. It is strongly recommended to set a group to Inactive instead of deleting it.